In some cases, the CloudMail Mailbox Migration Tool can simply migrations by importing email, contacts, calendars, tasks, and notes to CloudMail from most third-party mail servers.
Important: While this feature does work in many cases, there are many unknown factors that can result in migration failures. This feature is offered on an AS-IS basis, and is not directly supported by CloudAccess.net Support Team. Clients who are unable to migrate their emails using this feature are encouraged to take a simpler option, to connect to their old server via IMAP and download all of their emails to their computer. Then connect to their new email server via IMAP and allow it to synchronize with emails stored on their local machine. In many cases, a local IT Professional is recommended to accomplish this process.
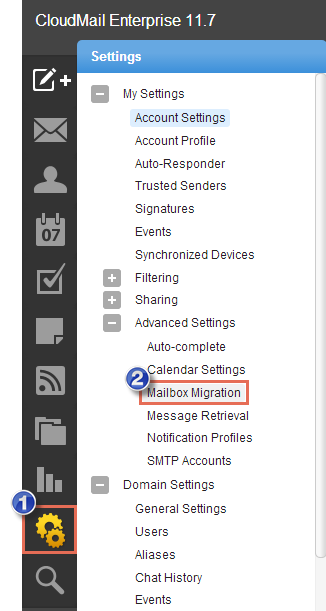
To access the mailbox migration tool, click the settings icon. Then expand the "My Settings" and "Advanced Settings" folders and click "Mailbox Migration".
The mailbox migration tool will open in a new window. Follow the on-screen instructions to import email and collaboration data from a third-party mail server to your CloudMail mailbox. Depending on the mail server you are migrating from, you may be asked to provide the mailbox protocol (POP, IMAP), the server address, port, username and password.
Note: It may take some time for your mailbox data to import. You can continue using CloudMail during this time as the migration process happens in the background. In addition, they type of items that are available for migration are purely dependent upon the service you're migrating from. CloudMail cannot migrate any item that is not allowed by the service provider.

A Note for Office 365 Users - Migrating from Office 365 is easy. However, there are a few things that aren't as clear-cut as moving from an Exchange server. Below is a step-by-step for anyone migrating from Office 365 to SmarterMail:
- When asked for the mailbox protocol, select "Exchange 2007 SP1 or Later".
- On the Account Settings portion of the migration you will need to log in to your Office 365 account and to get the Server Address for your Office 365 account.
- To do this, simply log in to your account and get it from the log in URL. For example, if your log in URL is something like https://ch1prd0412.outlook.com/owa, you will want to use "chr1prd-412.outlook.com" as the Server Address you're migrating from.
- Use the full email address you use to log in to Office 365 as your Username. For example, This email address is being protected from spambots. You need JavaScript enabled to view it.
- Use your domain name as the Domain for the migration. For example, if you log in with This email address is being protected from spambots. You need JavaScript enabled to view it. you'll just need to use example.com for the domain.
- You will need to check the Requires SSL checkbox.
- From there, the rest is easy. Just finish up the migration wizard and your Office 365 information will now be in CloudMail.