If you plan to manage your own DNS, but you want CloudMail to work on the CloudAccess.net platform, you will need to update your MX records in your DNS server or control panel. The most common way to do this is to login to your DNS provider's control panel, delete all current MX records and change the records to point to CloudAccess.net mail servers. If you unsure where your current MX records are facing; use the MXToolBox to look up your domain's MX record settings.
The DNS settings below need to be enabled for CloudMail to work. If you're unsure how to add these records to your DNS control panel, contact your current DNS provider and give them the settings listed below.
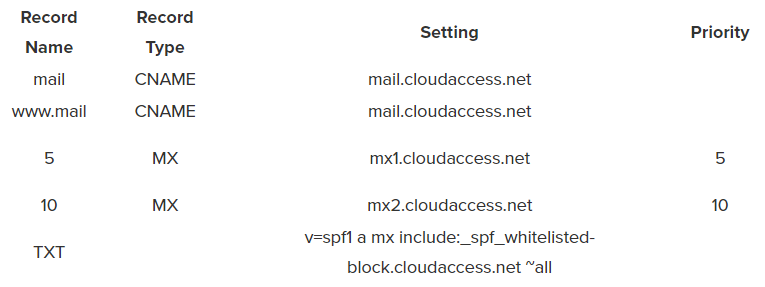
No other MX or SPF records should be required. These mail records will allow you to enter "mail.yourdomain.com" into your browser to allow you to access your CloudMail. Otherwise, you can log into your Cloud Control Panel™(CCP) and log into CloudMail.
NOTE: CNAME records create a shortcut to access CloudMail. For example, typing in "mail.yourdomain.com" will take you directly to the CloudMail service. You can change the “name of record” to webmail.yourdomain.com if you desire. It is not required that you use the CNAME we suggest, but we do advise that you keep the CNAME simple.
IMPORTANT TIP: It is much easier to allow CloudAccess.net to provide free managed DNS servers. However, you must change your name servers to point to Cloudaccess.net so you don't have to manage your own DNS. CloudAccess.net name servers are ns1.gridfast.net and ns2.gridfast.net. Once that is complete, CloudMail will be set up for you and our team can help with your mail settings. Our name servers automatically connect to your CloudMail service.